This is the final part of a series of blog posts concerning the MIL-STD 810 Shock Section, Method 516. This blog was written with reference to MIL-STD-810G w/Change 1 dated 15 April 2014. DES has the experience and expertise to run your MIL-STD-810 test. For more information, please check out our DES shock testing services page and our other MIL-STD-810 shock testing blog articles:
MIL-STD 810, Method 516, Shock Testing Overview
MIL-STD 810, Method 516, Shock Testing Procedure I – Functional Shock
MIL-STD 810, Method 516, Shock Testing Procedure II – Transportation Shock
MIL-STD 810, Method 516, Shock Testing Procedure III – Fragility
MIL-STD 810, Method 516, Shock Testing Procedure IV – Transit Drop
MIL-STD 810, Method 516, Shock Testing Procedure V – Crash Hazard Shock
Bench Handling Shocks are used to test products that may experience shocks on a work bench. Bench handling shocks could occur when items are being repaired or when they are in the process of being packaged. Products are tested in an unpackaged configuration and are usually non-operational during the test. Procedure VI is appropriate for medium-to-large test items that have a maximum dimension greater than approximately 23 cm (9 inches). Smaller products are typically tested to higher shock levels using Procedure IV, Transit Drop.
Bench Handling Shocks are performed on a solid wood bench top that is at least 4.25 cm (1.675 inches) thick. The procedure is:
- Perform an operational and physical checkout of the unit under test before start. Configure the test item as it would be for servicing, i.e., with a service panel removed, etc.
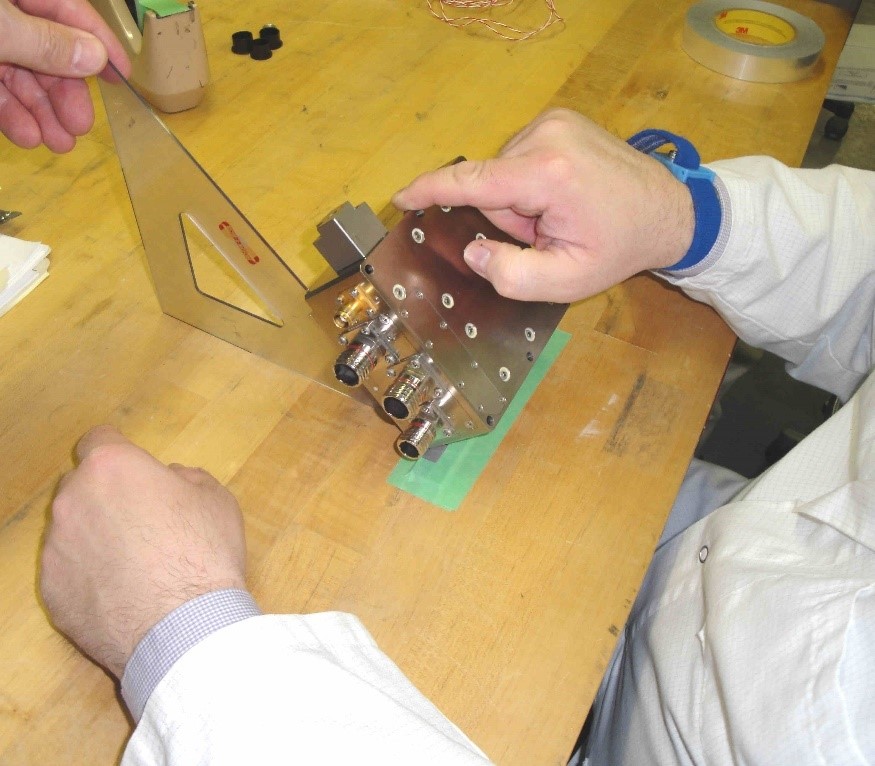
- Using one edge as a pivot, lift the opposite edge of the product until one of the following conditions occurs (whichever occurs first). This step is shown in Figure 1 above.
- The lifted edge of the chassis has been raised 100 mm (4 in.) above the horizontal bench top.
- The chassis forms an angle of 45° with the horizontal bench top.
- The lifted edge of the chassis is just below the point of perfect balance.
- Release the product and let the chassis drop back freely onto the horizontal bench top. Repeat using other practical edges of the same horizontal face as pivot points, for a total of four drops.
- Repeat Step 3 on other faces until the item has been dropped for a total of four times on any face on which it could be placed practically during servicing.
- Perform a visual inspection of the test item. Then perform a final operational and physical checkout and compare the results to step 1.
Typical failures are damaged cover protrusions, connections or even internal damage to the product. For more information on Shock Testing or other testing services, contact DES or call 610.253.6637.